Migrating Certificates and Decommissioning Exchange 2010
Problem
Continued from Migration From Exchange 2010 to Exchange 2013 Part 2
Solution
Exchange 2013 Migration Step 8 Migrating Certificates form 2010 to 2013
Only consider doing this if you have a purchased (i.e. NOT using a self signed) certificate on your Exchange 2010 server. Bear in mind if you have the internal FQDN of your Exchange 2010 server as a SAN (Subject Alternative Name), then you cannot renew the certificate if it lasts longer than November 2013, so you might want to purchase a new one anyway.
Also make sure the public name of the server resolves to the public IP of the new server (or you change the port forwarding for HTTPS traffic to point to the new server).
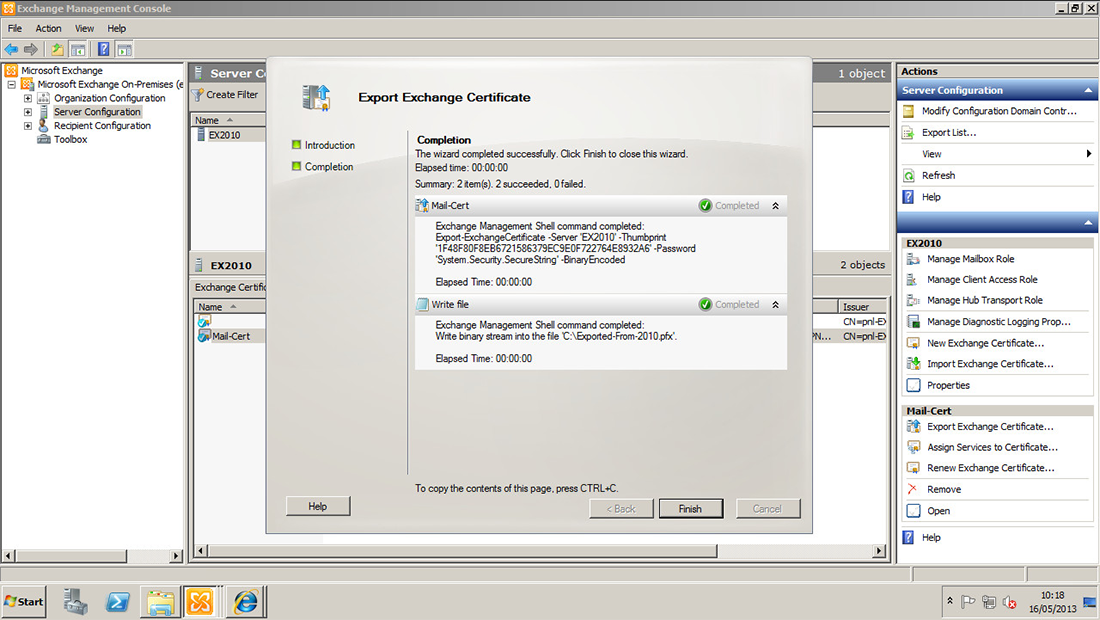
1. On the Exchange 2010 Server > Launch the Exchange Management Console > Server Configuration > Select the certificate > Export Exchange Certificate.

2. Select a location to save the exported cert > supply a password > Next.
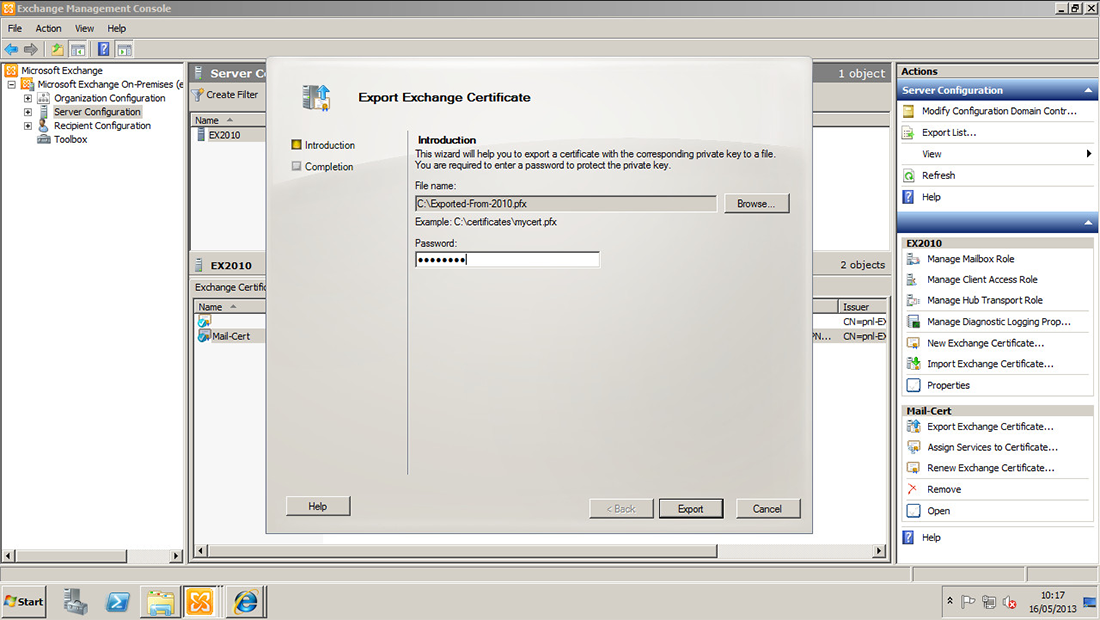
3. Finish.
4. On the Exchange 2013 Server > Launch the Exchange Admin Center > Servers > Certificates > Select the 'more options' icon > Import Exchange Certificate.
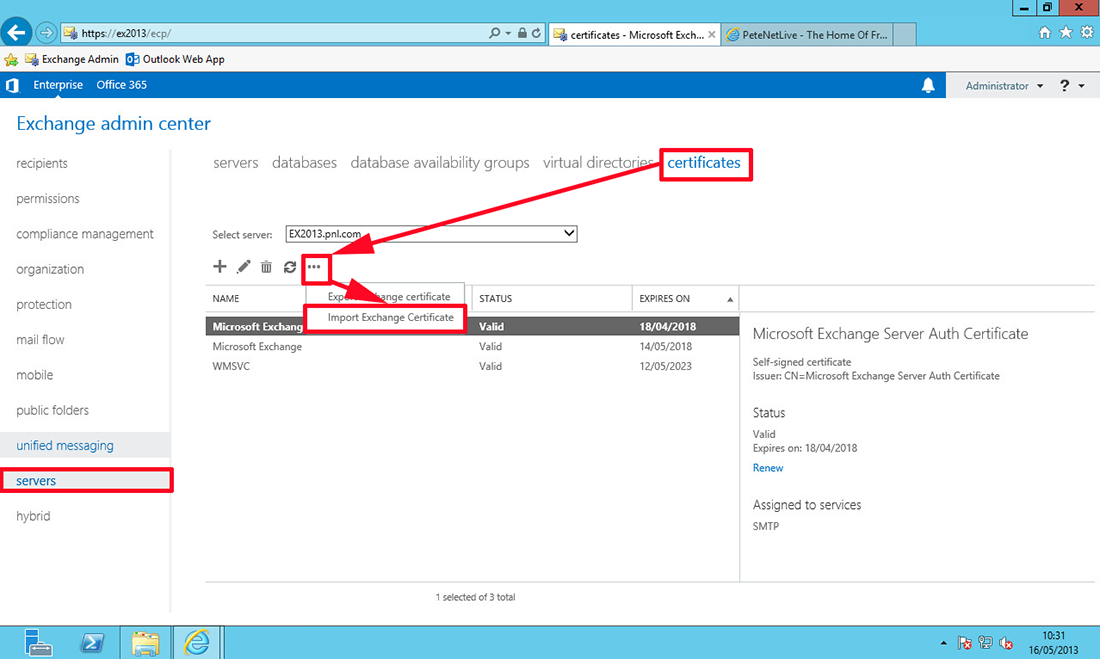
5. Put in the path to where you saved the exported cert, and the password you used > Next.

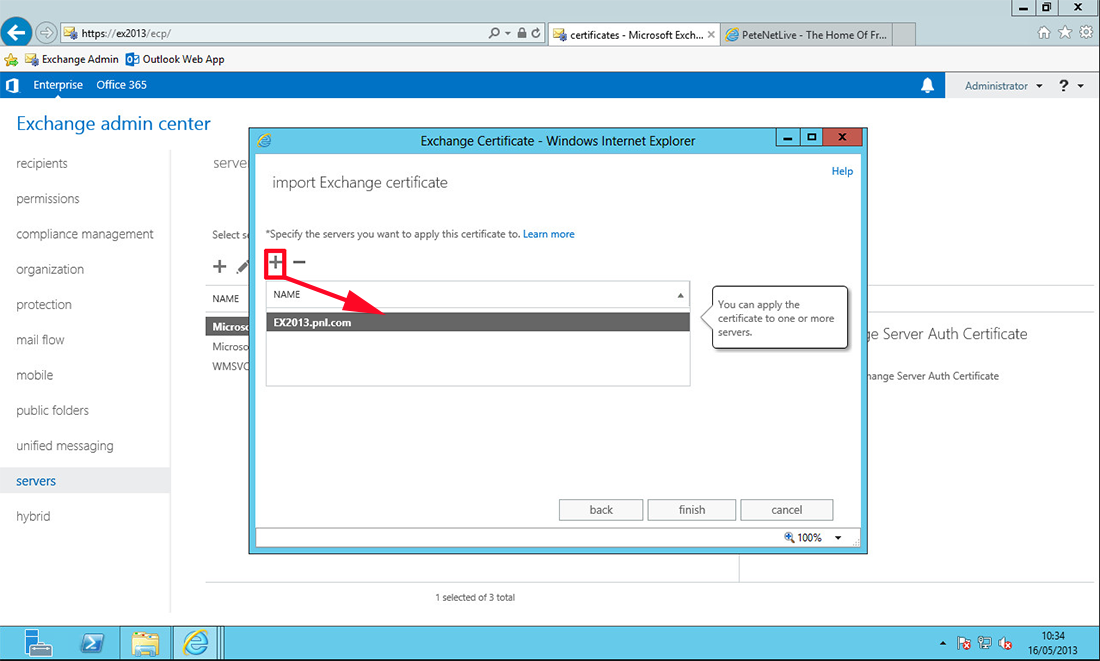
6. Add in the Exchange 2013 Server > Finish.
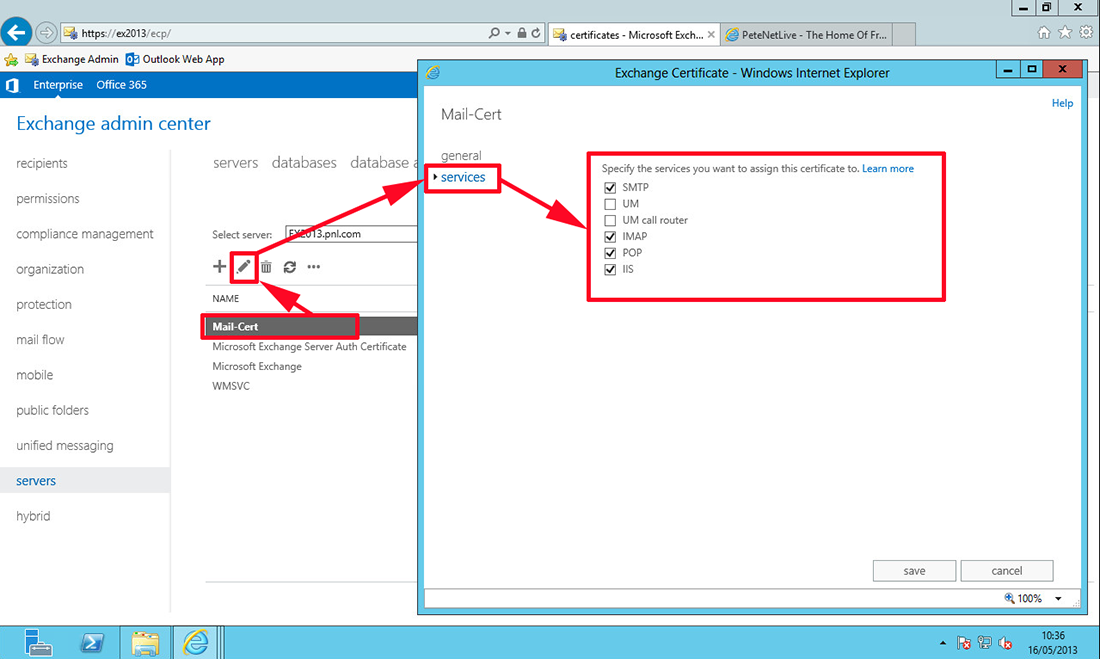
7. Select the new certificate > Edit > Services > Select the service for which you want to use the certificate. Note: I don't have Unified Messaging so I'm selecting all the other options > Save.
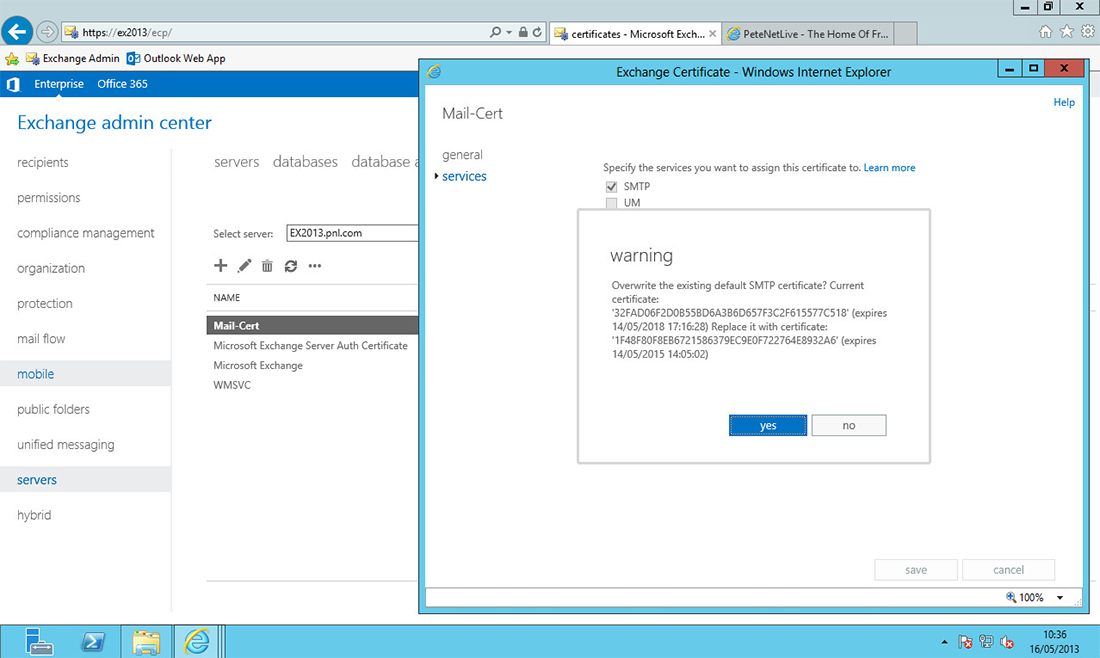
8. Answer 'Yes' to replace the self signed certificate that Exchange 2013 installs by default.
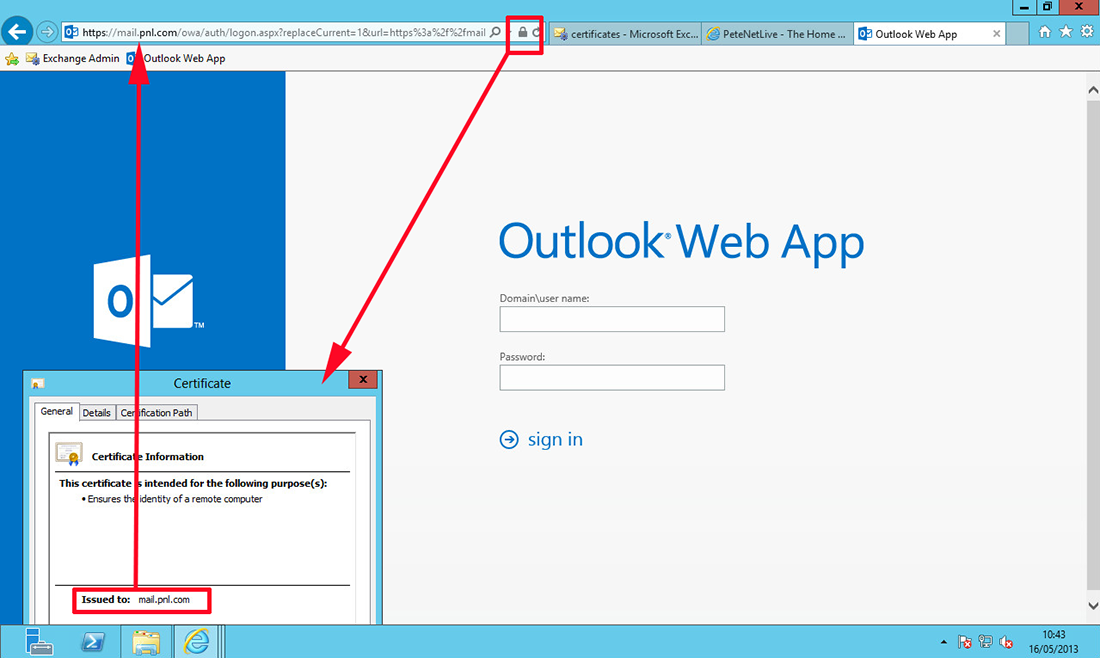
9. You can then open Outlook Web Access and give it a test (Remember to change the DNSrecords so that the Common Name on the certificate points to the new Exchange 2013 server).
Exchange 2013 Migration Step 9 Decommissioning Exchange 2010
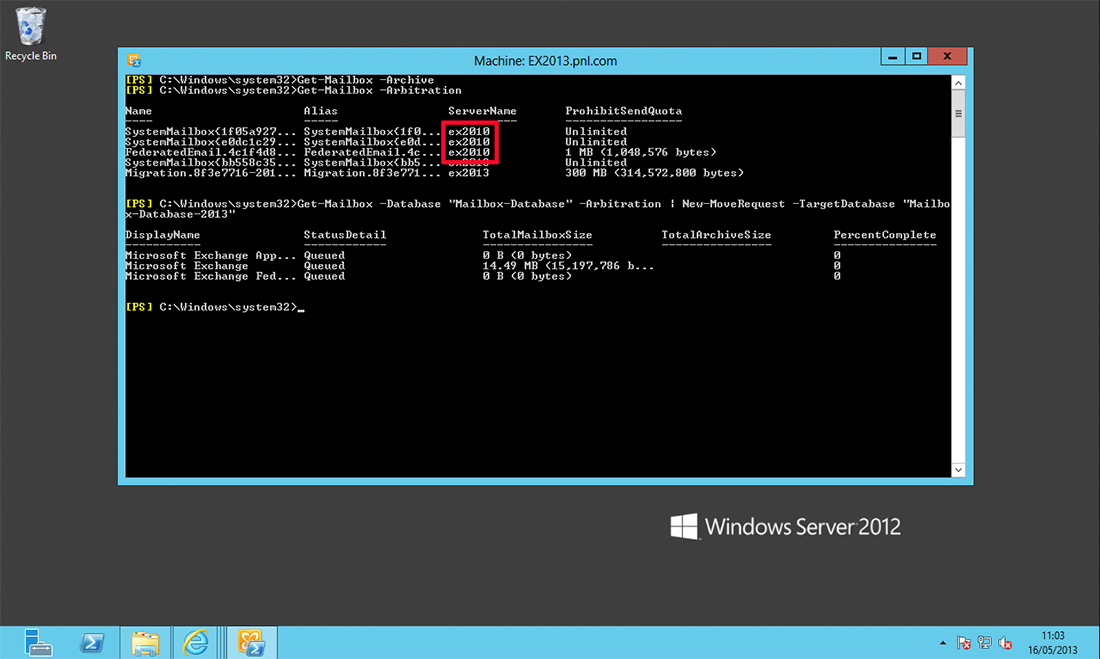
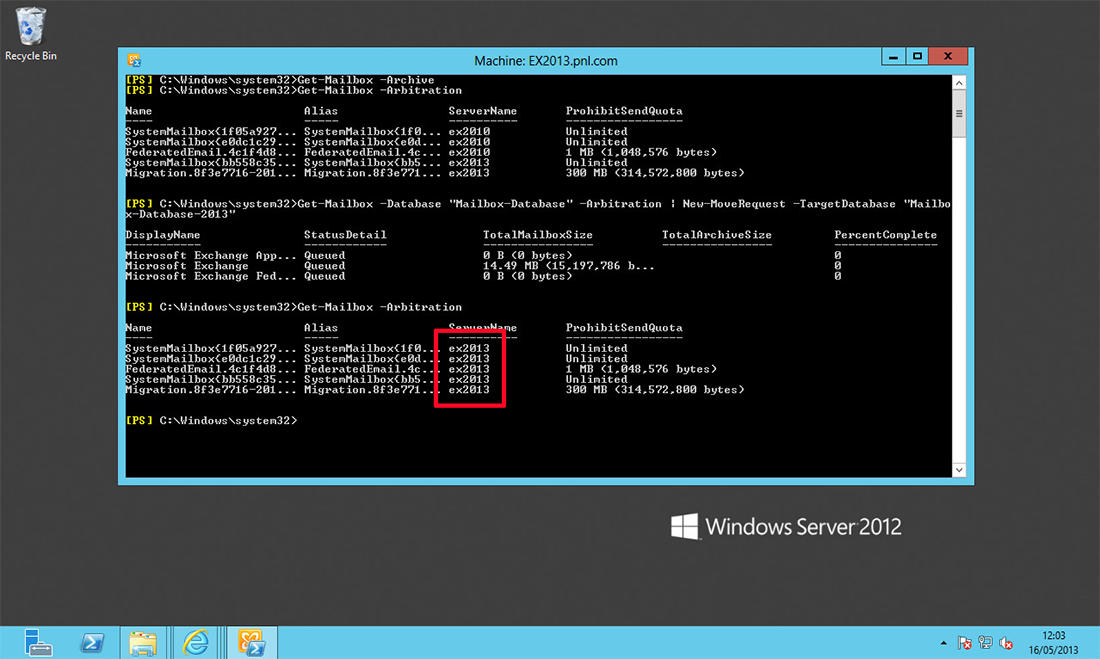
1. Before we can retire the old server we need to remove its databases, even though we have moved all the user mailboxes, If you try and delete the database it will complain that’s its not empty. This is because it will have either Archive or Arbitration mailboxes in it. To see, execute the following commands;
Get-Mailbox -Archive
Get-Mailbox -Arbitration
OR, If you have multiple source databases use the following syntax,
Get-Mailbox -Archive | fl name,database
Get-Mailbox -Arbitration | fl name,database
Get-Mailbox -Arbitration
OR, If you have multiple source databases use the following syntax,
Get-Mailbox -Archive | fl name,database
Get-Mailbox -Arbitration | fl name,database
As you can see (in the diagram below) I have Arbitration mailboxes left in the old Exchange 2010 database, to move them use the following command, Note: Execute this command from the Exchange 2013 Server!
Get-Mailbox -Database "Mailbox-Database" -Arbitration | New-MoveRequest -TargetDatabase "Mailbox-Database-2013"
Obviously if you have archive mailboxes use the same command, but substitute archive for arbitration.
Note: Update 04/11/13 (Credit to Jeroen Bonenberg)
You may also have a Discovery Search Mailbox that will need migrating. To do so, use the following syntax.
New-MoveRequest DiscoverySearchMailbox* -TargetDatabase "Mailbox-Database-2013"
2. Wait a while and then check that they have moved. Note: You can check status with 'Get-MoveRequest'.
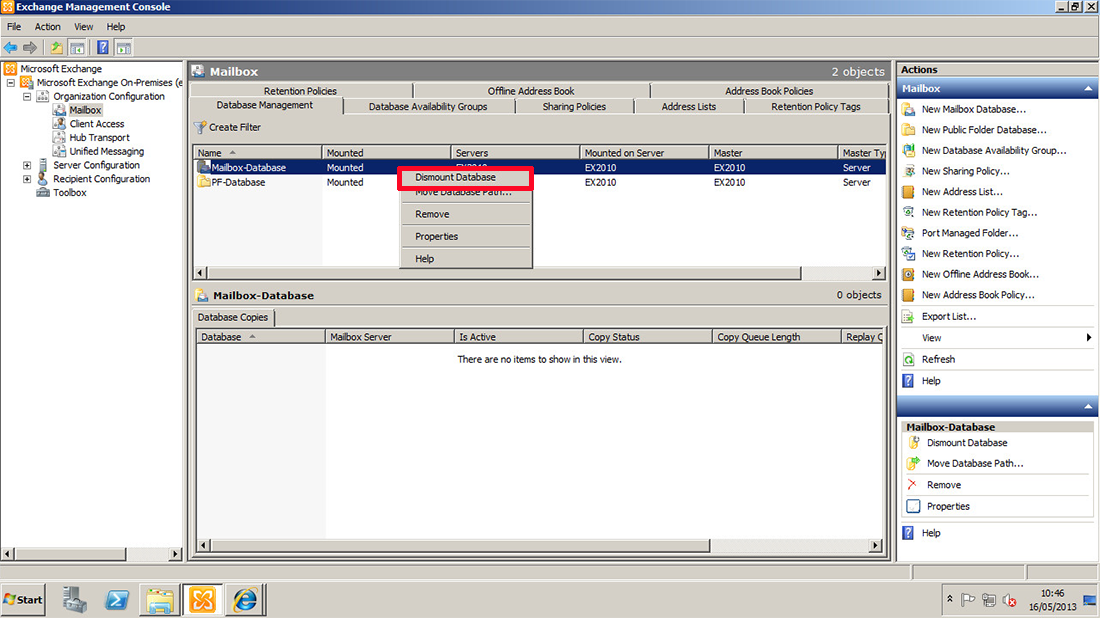
3. In the Exchange Management Console > Organization Configuration > Mailbox > Database Management > Select the mailbox database > right click > Dismount Database.
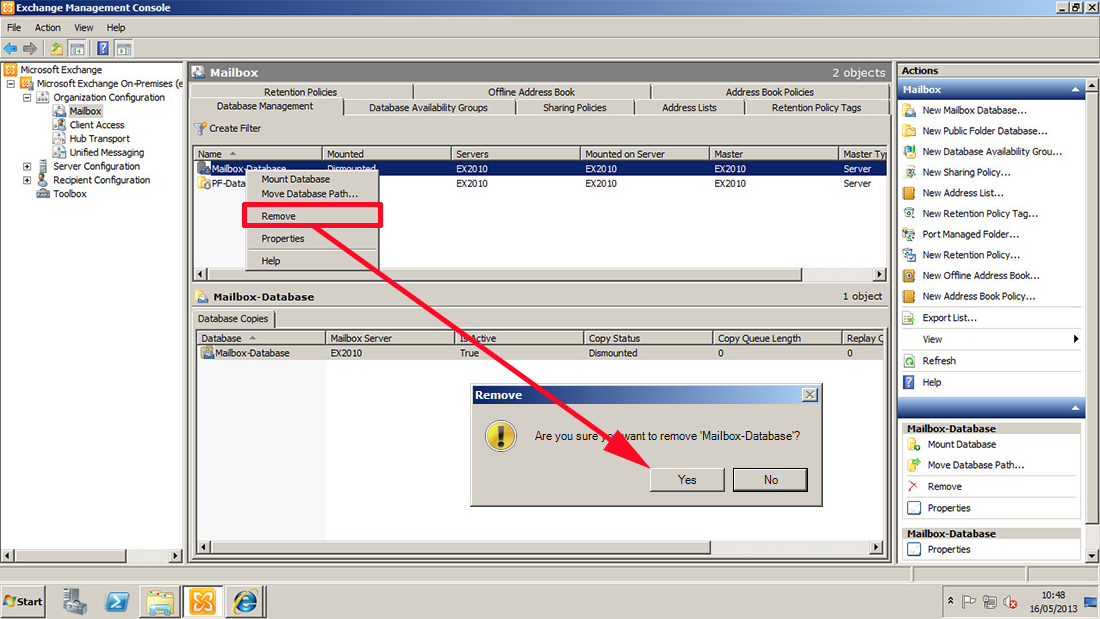
4. Now Remove the database > Yes.
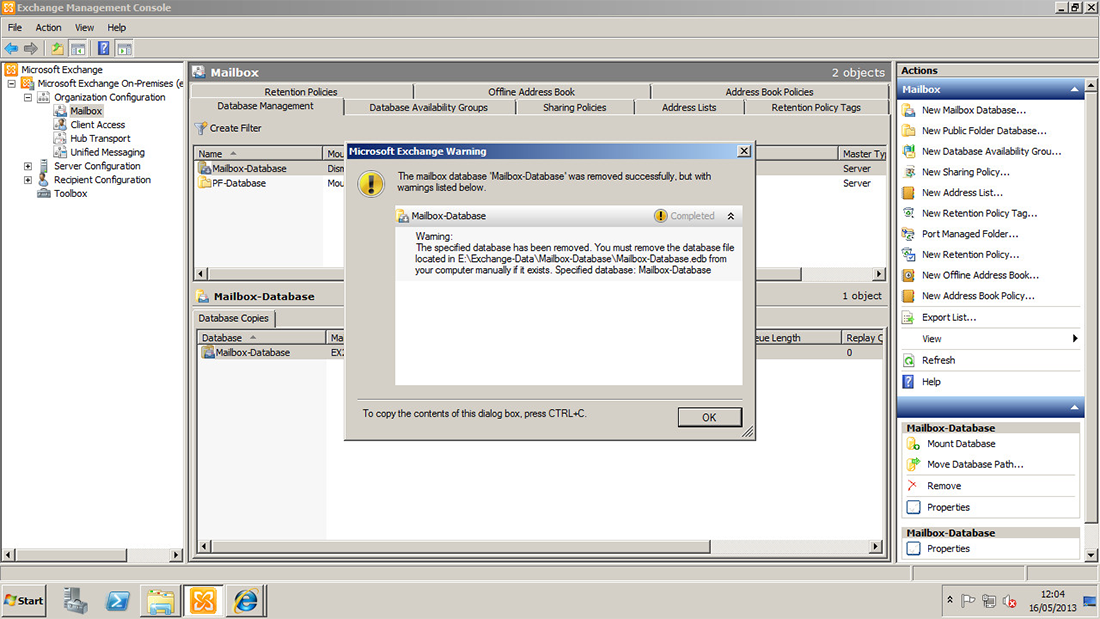
5. OK.
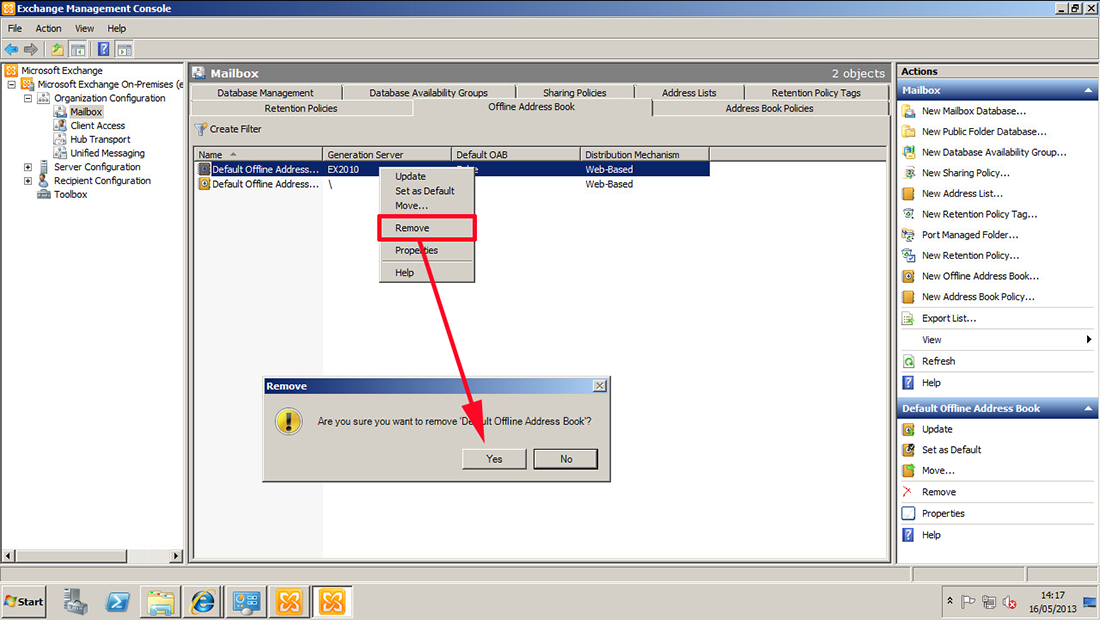
6. Offline Address Book Tab > Default Offline Address Book > Remove > Yes.
Note: If this OAB is still in use you will NOT be able to remove it, Go to the Address Book Policies tab > Change the default OAB from the 2010 one to the 2013 one.
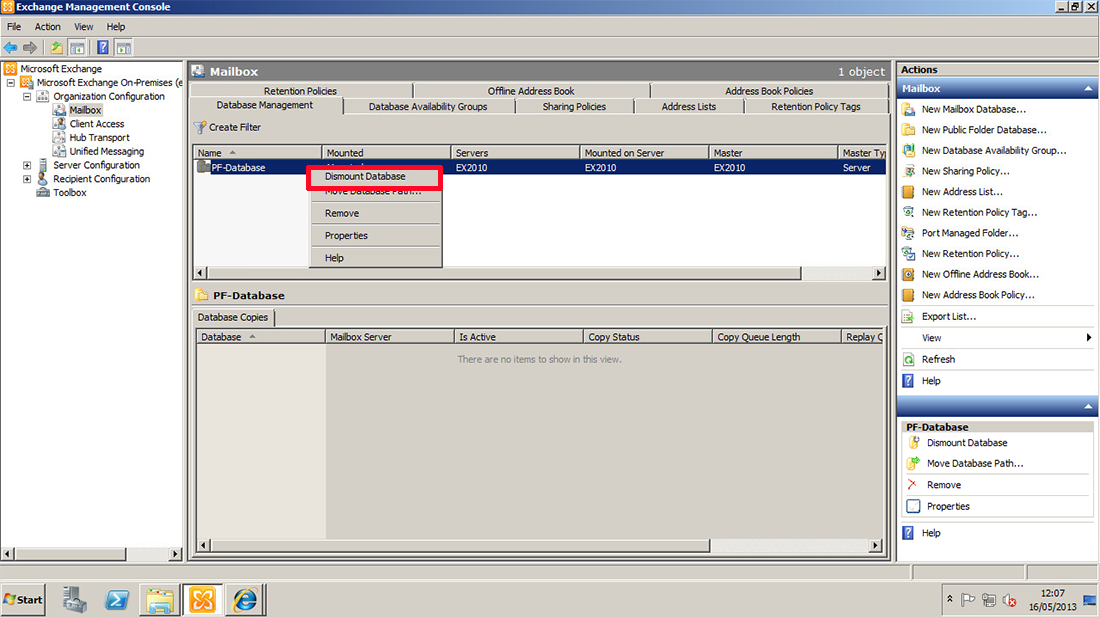
7. If you try and remove the public folder database it will complain that it contains replicas, which you cant remove. The easiest way I’ve found to remove it is as follows. Dismount the public folder database.
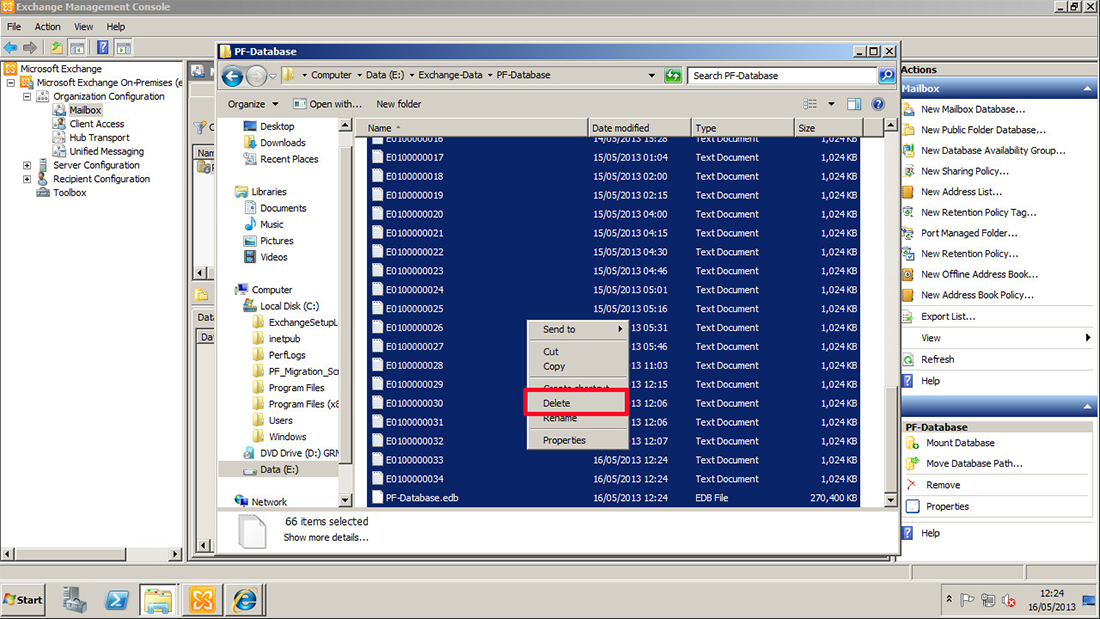
8. Then delete (or move if you are paranoid) the database file (.edb file) and the logs for this database.
9. Then mount the database > Yes to all > It will mount a blank empty database.
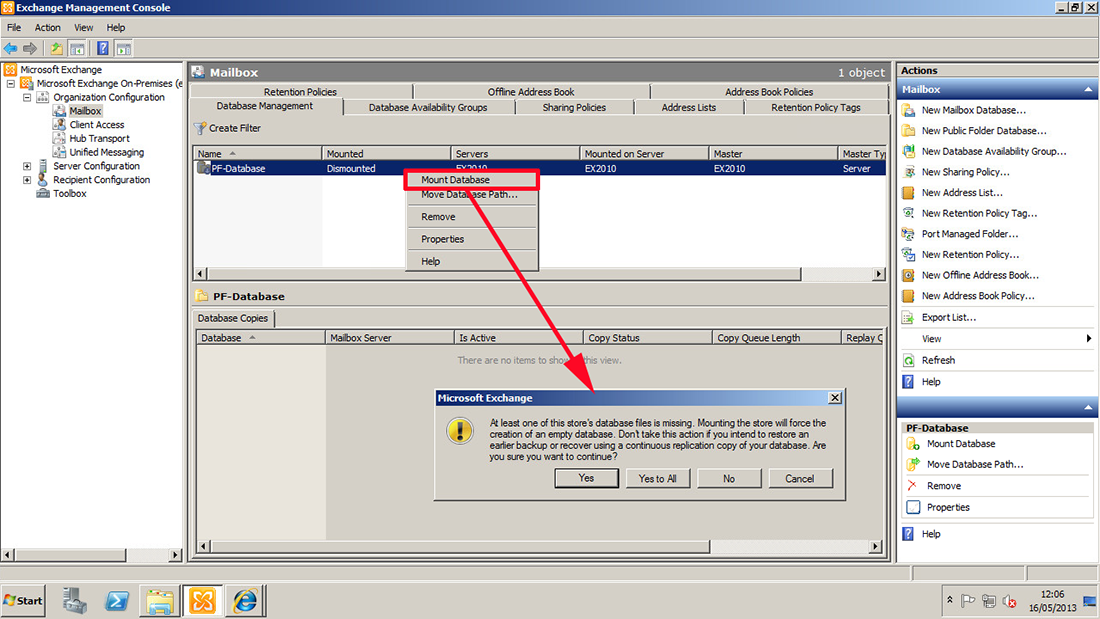
10. You can now delete the database without error.

11. OK.

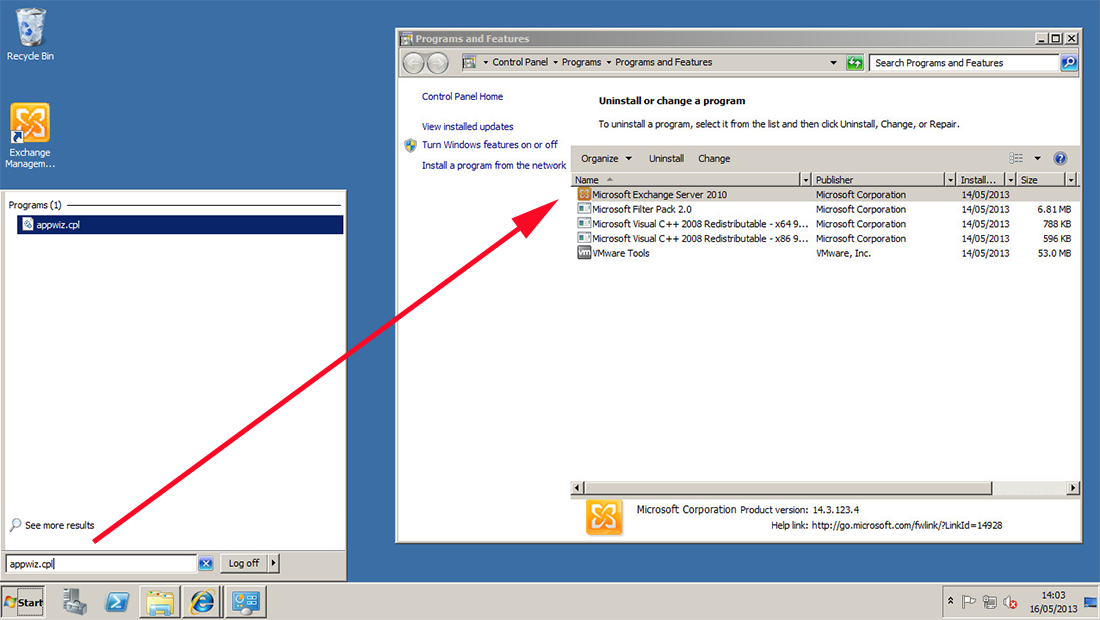
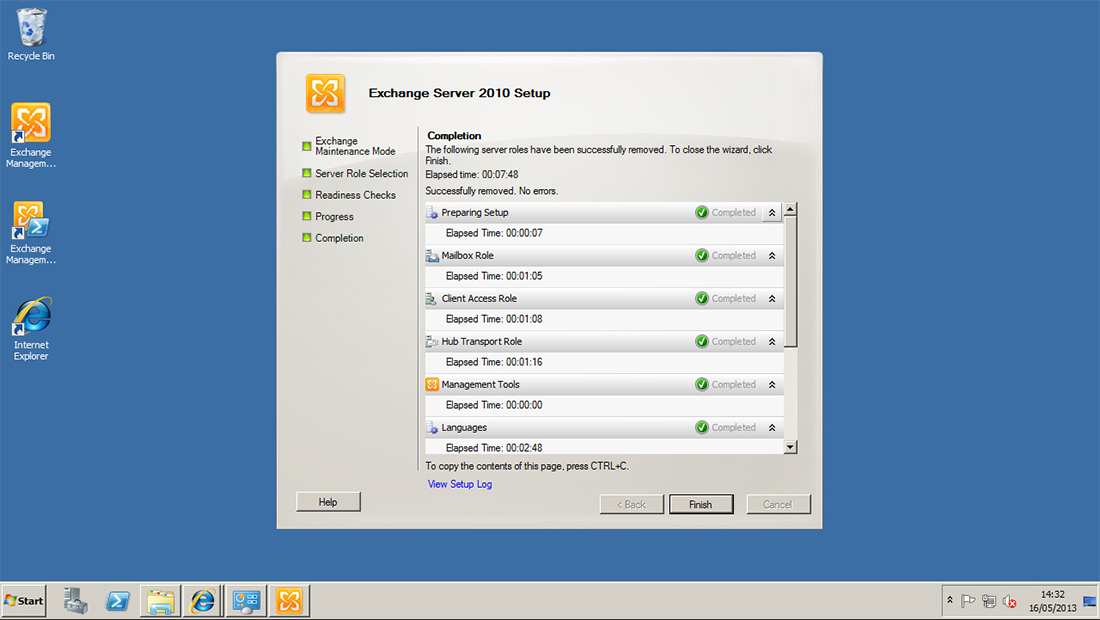
12. Close Exchange System Manager > Start > In the search/run box >appwiz.cpl {Enter} > Locate Microsoft Exchange Server 2010 > Uninstall.
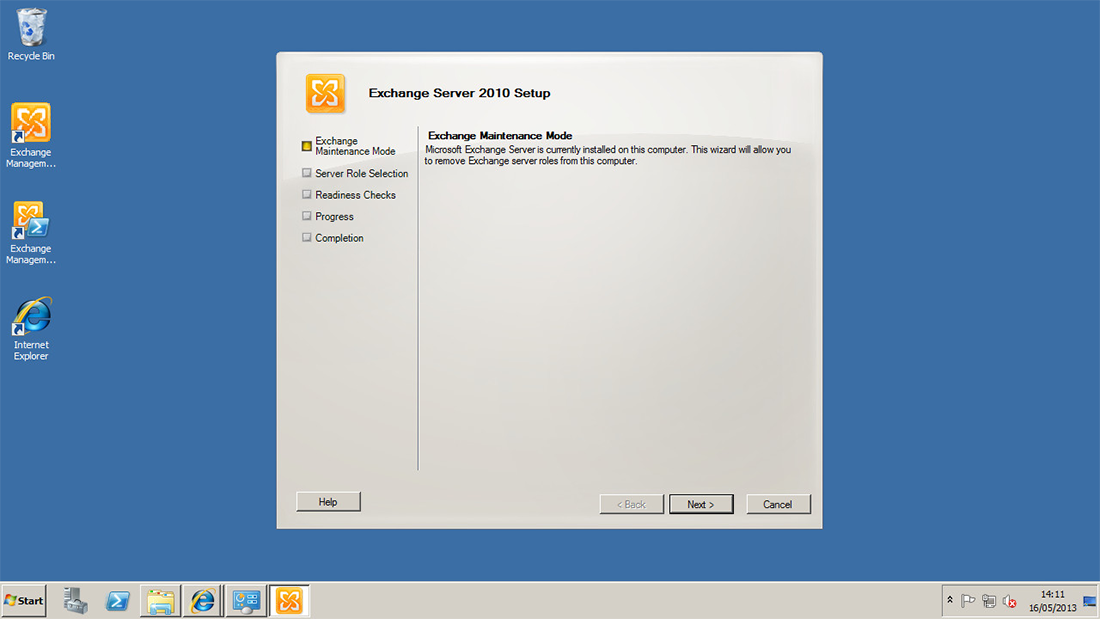
13. Next.
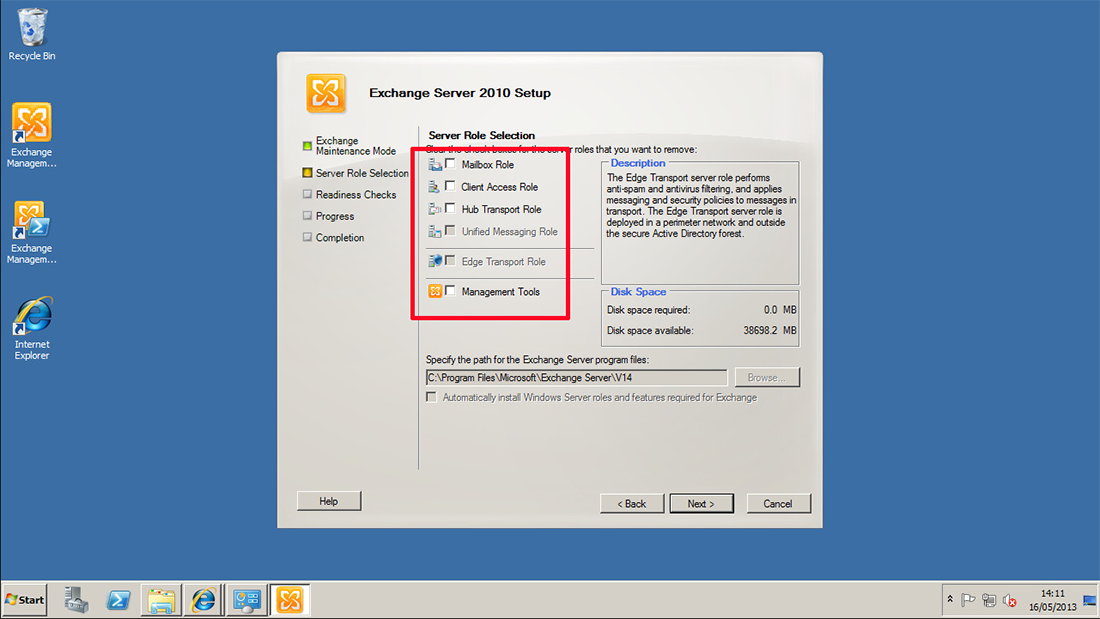
14. Untick all the installed roles > Untick Management tools > Next.
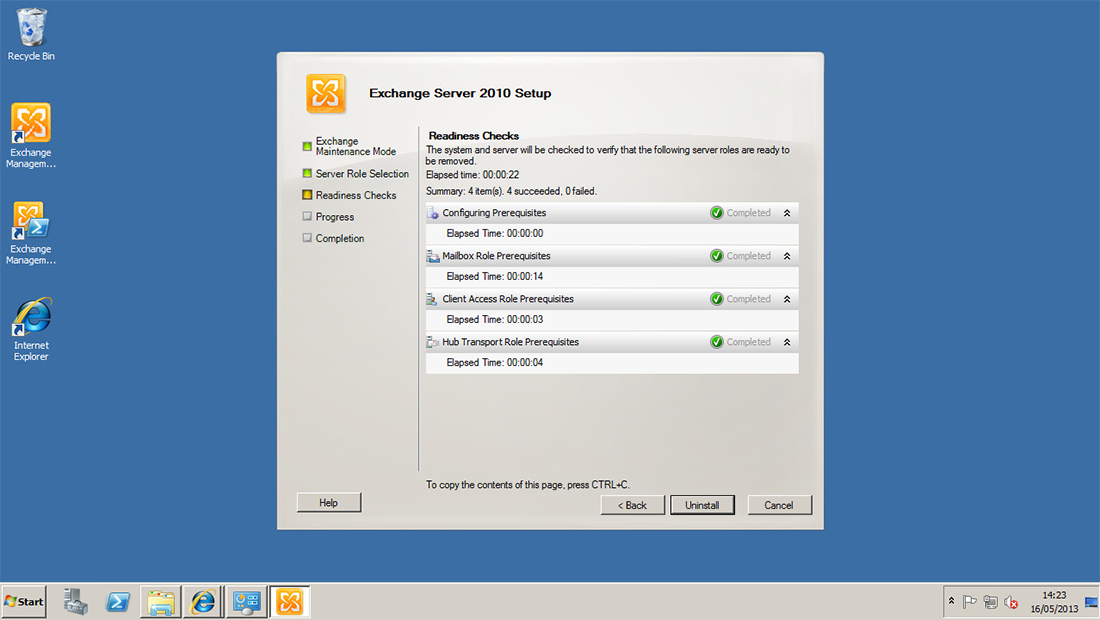
15. Uninstall.
16. Finish.
Exchange 2013 Migration Step 9 'Finish Up'
Remember if you are keeping this server, you might want to delete all the database files which get left behind. You will also want to change your backup software so that it is pointing to the new mailboxes/databases.
Related Articles, References, Credits, or External Links
Thanks to Shawn Welker for the Arbitration/Archive feedback
Thanks to leandro.chiesa for the OAB feedback
Thanks to leandro.chiesa for the OAB feedback
No comments:
Post a Comment