I recently blogged about how in vSphere 5.1 you can now assign full admin privileges to named users, and in that post I commented that while it is possible to create local user accounts on each vSphere host that a better approach is to add your host to a Microsoft Active Directory (AD) domain and use your existing AD credentials instead. In this post I will provide an example showing how to do this.
Note that although the ability to assign full admin privileges to local users is new in vSphere 5.1, the ability to join vSphere hosts to active directory is not new. In this example I’m using vSphere 5.0.
Prerequisites
Of course before you can add your vSphere hosts to AD you need to have an AD domain. In addition you need to have a domain admin account with the rights to add computers to the domain.
Adding vSphere Hosts to Active Directory
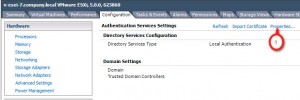
To add a vSphere hosts to AD log on to the vSphere Client and from the “Host and Clusters” view:
- Select the host.
- Select the “Configuration” tab.
- Select “Authentication Services”.
- From the “Authentication Services Settings”, select “Properties…”.
This will launch the “Directory Services Configuration” wizard where you will:
- Set “Select Directory Service Type” to “Active Directory”.
- Enter the name of the AD domain.
- Click “Join Domain”.
When you click “OK” you will be prompted to enter the username and password of the AD domain admin account that will be used to add the host.
Monitor the progress in the “Recent Tasks” section and make sure it completes successfully.
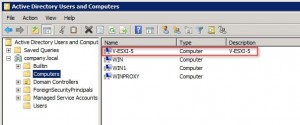
That’s it, the host has been added to Active Directory and a corresponding computer account for the host created.
The next step is to setup user privileges. There are a couple ways to do this, you can assign privileges to individual users or to AD groups.
Assign Privileges to a User
To assign privileges to individual users you need to use the vSphere client and connect directly to the vSphere host.
Once you have logged in select the “Permissions” tab, right-click on the white background and select “Add Permission…”.
From the “Assign Permissions” pop-up you first need to select the user by clicking the “Add” button.
This will bring up the “Select Users and Groups” pop-up. Use the pull-down menu to change the “Domain:” to the name of the AD domain, find the user in the list, click “Add”, and then click “OK”.
Next, choose the role to assign to the user. Use the drop-down menu on the right to select the desired role and then select OK.
The user is now shown with the assigned role:
Note you will need to repeat these steps for each user on each vSphere hosts.
Assign Privileges to a Group
To help simplify the configuration you can assign permissions to an AD group opposed to individual users. With groups you only need go through the steps to assign privileges to the group once on each host opposed to once for each user. Once you assign the privileges to the group you manage user access by simply adding and removing users to/from the group in AD.
The steps to assign privileges to an AD group are the same as shown above, the only difference is instead of choosing a user you would chose a group.
The “ESX Admins” Group
Using AD groups helps simplify user configurations but there is still a requirement to repeat the configuration on each host, and if you have a lot of hosts this can still be a bit tedious. To avoid having to connect to each host to manually setup a group account VMware provides a default AD group named “ESX Admins” that automatically gets added to each host by default.
The key to remember here is that not only is this group added to each host, but by default it is also granted full administrative rights. As such it is important to limit the AD users who get assigned to the “ESX Admins” group. Arbitrarily assigning all vSphere admins to the “ESX Admins” group could compromise security. A few important things to note about the “ESX Admins” group:
- The group is not created in active directory by default. An administrator must manually create the group, but once created by default all users that are members of this group get full admin access to all vSphere hosts added to the domain.
- You can disable admin access to the “ESX Admins” group using the “Config.HostAgent.plugins.hostsvc.esxAdminsGroupAutoAdd” setting.
- You can change the name of the “ESX Admins” group using the “Config.HostAgent.plugins.hostsvc.esxAdminsGroup” setting.
Summary
Adding your vSphere hosts to Active Directory can simplify user management and help improve security. It’s relatively easy to add local users to a hosts and to assign them administrative privileges, but if you have a lot of administrators the steps to configure each account will need to be repeated multiple times on each host.
You can simplify the local user configuration by using AD groups. With groups, rather than repeating the setup for multiple user accounts you only need to configure the group account once on each host. Once privileges have been assigned to the group you control who has access to the host by adding and removing users to/from the AD group.
VMware provides a default AD group called “ESX Admins” that, if created in AD, will automatically get added to each host when it is added to active directory. By default the “ESXi Admins” group is assigned full administrative rights to the vSphere host so it’s important to limit the users that are members of this group. You can change this behavior, as well as change the name of the group using the “Config.HostAgent.plugins.hostsvc.esxAdminsGroupAutoAdd” and “Config.HostAgent.plugins.hostsvc.esxAdminsGroup” settings.


No comments:
Post a Comment